The Artist 12 Pro is one of the best budget display drawing tablets (tablets that have their own screen) currently being sold. It is a rare combination of affordability and feature-packed hardware bundled together.
Everything About the Artist 12 Pro
This article will be organized in topics so that you can find exactly what you’re looking for.
- Basic Features and Technical Specifications
- Difference Between Display Tablets and Pen Tablets
- Design
- Build Quality
- Roller Wheel (Dial)
- Shortcut Buttons
- Dimensions
- Screen Technology
- Screen Display
- Screen Resolution
- Screen Colors
- Anti-Glare Optical Film
- Stylus (Digital Pen)
- Drawing Tablet Stand
- Compatibility
- Driver Settings
- What Comes in The Box
- First Impressions
- Drawing Experience
- Best Features
- What Could Be Improved
- Why the Artist 12 Pro Makes Artwork Look Better
Basic Features and Technical Specifications
Here’s a comprehensive list of the main characteristics you will find in this tablet manufactured by XP-PEN. Along the article I will go into detail explaining why this information is important and how each one of these items affect that quality of the tablet.
| Artist 12 Pro Specifications | |
|---|---|
| Active Drawing Area (mm) | 256x144 |
| Pen | BAttery-Free Stylus |
| Pressure Sensitivity | 8,192 Levels |
| Tilt | 60 Degrees |
| Roller Wheel (Dial) | 1 |
| Shortcut Keys | 8 |
| Resolution | 5080 LPI (Lines per Inch) |
| Display Resolution | 1920x1080 pixels |
| Display Color Gamut | 72% NTSC |
| Input Device | USB |
| Operating System | Windows / OS |
What is the difference between pen tablets and display tablets?
Unlike pen tablets (drawing tablets without a screen), display drawing tablets are substantially different from each other and this is precisely why it is vital that you read as much as possible about the device you are planning on buying.
Please, check the notes below to fully understand the difference between a display tablet (like the Artist 12 Pro) and a pen tablet.
What are display drawing tablets?
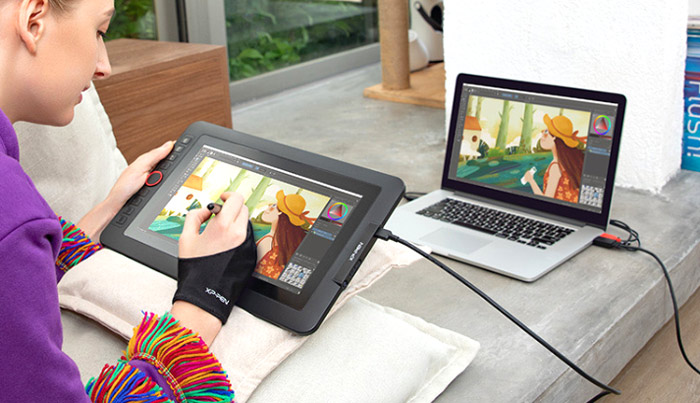
Display drawing tablets are devices that have their own screen, but still need to be connected to a computer in order to be used.
In this case, the artist draws directly onto the glass surface of the tablet and the strokes appear both in the tablet’s and the computer’s screen at the same time.
See the picture below to see what the setup looks like.
Display drawing tablets are:
- Easier to work with
- Better for intricate artwork
- More expensive
On the other hand, there are pen tablets. These devices have ruled the market for many years and used to be the standard of the industry until display tablets became more affordable and took over the market by storm.
What are pen tablets?
Pen tablets are simpler devices usually made of a plastic drawing board accompanied by a few shortcut buttons.
Although these devices are perfectly fit for professional artwork, they are not as easy to work with as display tablets due to the fact that drawing on a plastic board and seeing the strokes appearing in a screen in front of you take some getting used to. On top of that, the drawing experience simply isn’t as accurate.
PROS:
- Recommended for professional work
- Much more affordable
- Great entry-level devices
CONS:
- Loss of accuracy
- Steeper learning curve
- Not as fun to draw with
While the difference between an expensive pen tablet and a cheap one is mostly noticeable when it comes to non-core functions, such as drawing area size, shortcut keys, portability, wireless connection and so on, when it comes to display tablets it is the core function, drawing, that varies tremendously.
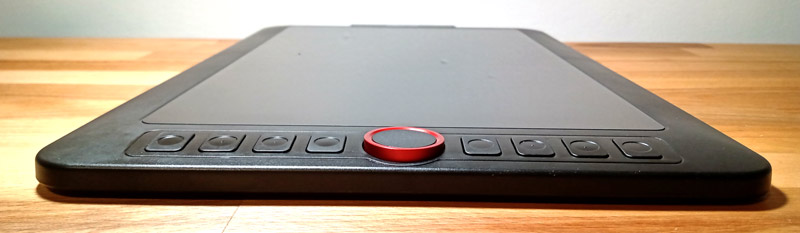
Design (What the Artist 12 Pro Looks Like)
So far this is my favorite design by XP-PEN, this tablet looks and feels exactly like it was made for art creation. It is obvious that the company has put a lot of effort into developing something that is easy to hold, comfortable to draw on and great to look at.
Build Quality
The first aspect I noticed as soon as I held the Artist 12 Pro is that this is not an average budget drawing tablet. It was clearly manufactured with good materials, from the body of the device to the glass screen that the artist draws on. There’s only one characteristic I would change if I could, instead of having plastic shortcut buttons, I would have chosen something made of rubber or a similar material. This is just a minor detail though.
The tablet weighs 2.1 pounds (989 grams) and is slightly heavier than I expected. I could immediately tell that this was not some generic cheap version of a Wacom, but rather a fully functional drawing tablet that stands on its own.
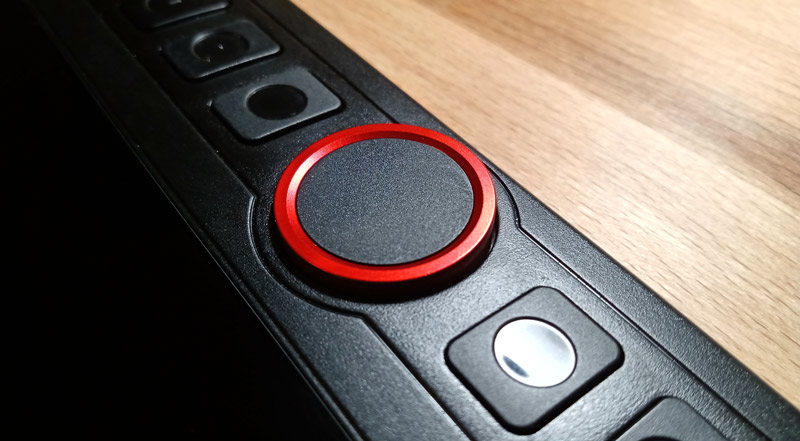
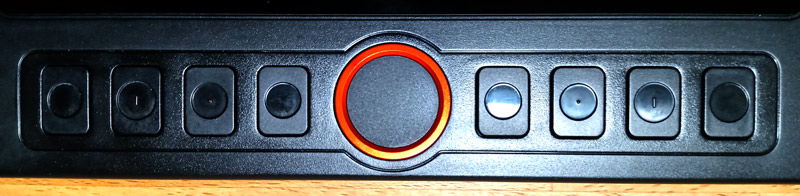
Roller Wheel (Dial)
The roller wheel, also known as dial, is a special round button located on the left-hand side of the tablet that allows the artist to zoom in and out of the canvas simply by rotating it.
This button can be configured through the driver settings to perform other tasks such as moving the canvas up and down or left and right.
Although configuration is possible, using it for zooming purposes is definitely the smart thing to do because the zoom tool tends to be used hundreds of times during the course of artwork creation.
The roller wheel (dial) is one the most important features a drawing tablet can have because it has the potential of saving artists numerous hours of extra work.
Shortcut Buttons
There are 8 entirely programmable shortcut keys. Don’t be afraid of the word “programmable”, there’s no need for any coding whatsoever.
All you need to do is open the Artist 12 Pro Driver and select which buttons you would like to assign functions to. Once you choose a button, simply select how you would like it to behave.
For example: you may pick the very first button at the top of the drawing tablet and use it as a SAVE FILE key, so whenever you need to save your artwork, instead of clicking around the screen, simply press that button and it’s all done.
8 shortcut buttons are more than enough to perform all of the most important tasks an artist needs virtually instantaneously.
These are the actions I usually assign to my drawing tablets’ buttons:
- Save
- Save As
- Undo
- Redo
- Primary Brush
- Secondary Brush
- Tertiary Brush
- New Layer
Since I use multiple brushes while working, specially with Photoshop and Painter, I like to keep the main ones on my shortcut keys, this way I can switch between them instantaneously.
Dimensions
At 3.8 inches (35.1 centimeters) in height, 8.8 inches (22.5 centimeters) in width and 5 inches (12.9 centimeters) in depth, the Artist 12 Pro has a great size, fit nicely into any regular table and it’s only slightly smaller than an average laptop.
Despite the fact that the device does fit inside of a backpack, I recommend that you do not carry it this way due to the fact that the glass screen may crack during transportation.
Screen Technology
The Artist 12 Pro comes with a high definition fully-laminated screen that keeps its precision even when seen from an angle up to 178 degrees (it does not matter from which angle you look at the tablet while drawing, you will still get an accurate depiction of your artwork).
I know that this may sound a little abstract, so let me explain why laminated screens are better than all the other options.
Tablet screens are composed by three different layers:
- Glass (top)
- Touch Sensor (middle)
- Display (bottom)
The more layers a screen has, the thicker it becomes and the thicker it is, the less accurate the tracking of the pen is.
To make it simple: thick multi-layer screens are not great because the point where the pen touches the glass surface is not perfectly recognized by all three layers. This difference is usually corrected through the software, but the result is always partially inaccurate.
This is precisely the situation in which you get what is called parallax.
What is parallax?
Parallax is that tiny difference between the screen area touched by the pen and what the touch sensor actually recognizes.
Although the difference is minimum, it can be a problem when it comes to drawing, which is an activity that requires extreme accuracy.
Most artists are able to get used to parallax and change the way they draw in order to counterbalance this inaccuracy.
This does not change the fact that parallax is an annoyance and that you should do everything you can to avoid purchasing a drawing tablet that has this problem.
This is where the laminated-screen technology comes into play.
Unlike regular screens, the laminated ones are not composed by multiple layers, but rather by a single layer that performs all the tasks at the same time.
The result is a better pen tracking and a much more comfortable drawing experience.
I haven’t experienced any kind of parallax with the Artist 12 Pro and it’s safe to say that XP-PEN’s technology regarding this part of the manufacturing process has reached full maturity.
Screen Display (Active Drawing Area)
Knowing the dimensions of any drawing tablet is important because this way it’s possible to know where if fits; however, the most important aspect is undoubtedly the active drawing area size, which is actually the screen that you are going to use to draw on.
The Artist 12 Pro has a 10-inch (25.6 centimeters) by 5.6 inches (14.4 centimeters) active drawing area. These dimensions are more than enough for you to draw comfortably, especially if you are not used to drawing on those huge tablets that cost thousands of dollars.
Screen Resolution
This drawing tablet has a screen resolution of 1920 x 1080 pixels comprised in 5080 LPI (lines per inch), which looks amazing, especially when you are not used to it and turn on the tablet for the very first time.
Every computer monitor, laptop or display drawing tablet comes with screen resolution information, but do you know what screen resolution actually is?
What is screen resolution?
Screen resolution is the amount of horizontal and vertical lines composed by pixels on a screen (definition by PCmag).
The more pixels a screen has, the more the user can see without the need of scrolling. Stating that a screen has a 1920 x 1080 resolution simply means that there are 1920 pixels in each horizontal line and 1080 in each vertical one.
Screen Colors
Before getting technical, I want you to know this: out of all the screens I have at home, the one on the Artist 12 Pro is certainly the most accurate, colorful and vivid looking one.
To be more precise, I wasn’t even aware that the colors on my other screens looked so boring and opaque until I compared them to the one in this drawing tablet.
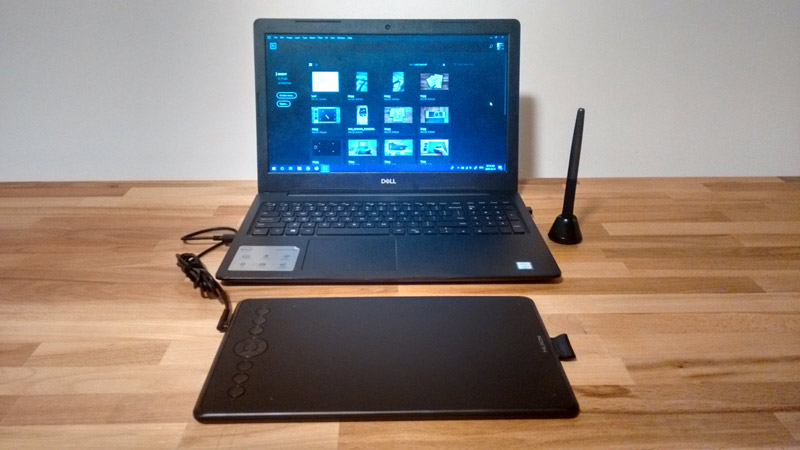
As you may know, display drawing tablets are not standalone devices, which means that although they have their own screen, they still need to be connected to a computer.
Once you unbox the tablet and install everything, your setup will look similar to the picture below (a screen in front of another screen).
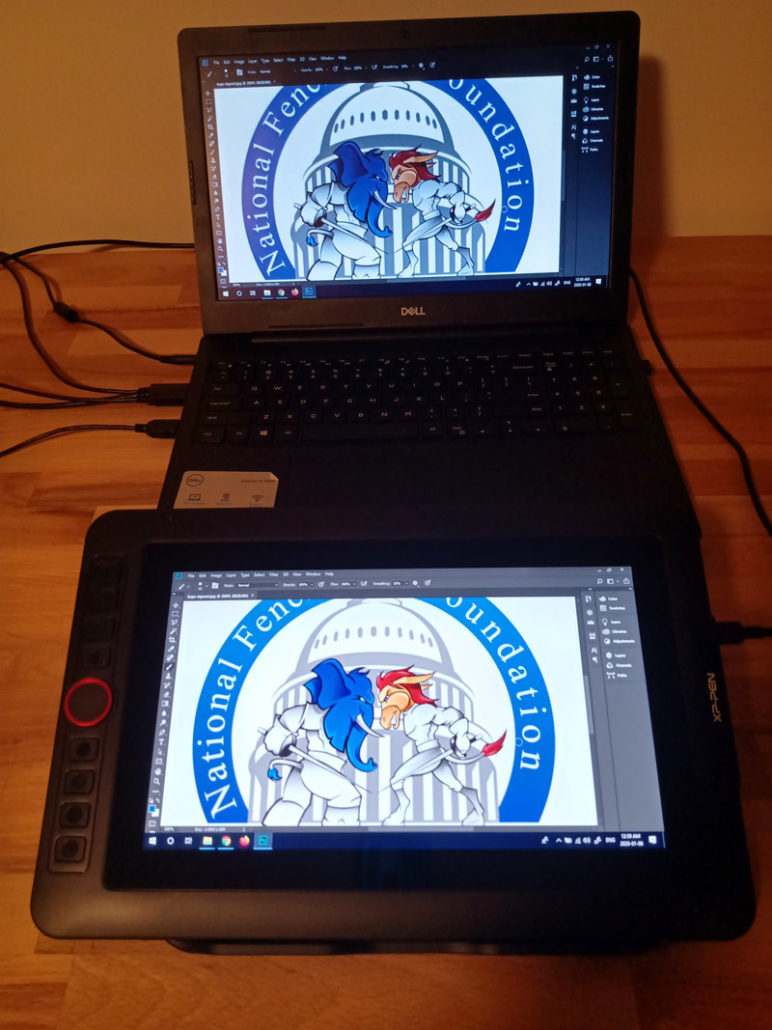
This is when you will notice the color difference between the screen you are currently using to the one that comes with the Artist 12 Pro.
Now, moving on to the technical aspect: this drawing tablet has a 72% NTSC color gamut.
Don’t worry, I will explain you what Color Gamut and NTSC mean, it’s quite simple.
What is color gamut?
Color gamut simply means the range of colors that can be seen by the human eye. A perfect screen would display the entire color gamut rendering a flawless representation of the real world. Looking at a screen like this would feel almost like looking through a window.
As we all know, technology is not perfect and although screens are getting better by the minute, they still have limitations.
Now that you know the meaning of color gamut, you should be aware that different screens reach different levels of that range. This is one of the reasons why standards such as the NTSC were created.
What does NTSC mean?
NTSC stands for National Television Standards Committee. This was an attempt to create a standard that all televisions (and now monitors and screens) should follow in order to better assess the quality of new products and to keep compatibility issues at bay.
Even though these days there are screens that follow other standards, NSTC is still relevant and widely used all over the world.
The question you must be asking yourself is:
Is this 72% NTSC Color Gamut mentioned on the Artists 12 Pro documentation good enough?
Like I said before, it’s better than good enough. You will be positively surprised as soon as you turn on the tablet for the very first time.
Here’s a comparison between my computer’s screen colors and
the Artist 12 Pro:
Artist 12 Pro Screen Colors

Laptop Screen Colors

Display Settings
As I have mentioned, the Artist 12 Pro screen has amazing colors. Out of all the drawing tablets that I own, this is surely among the best.
What some people don’t know is that it’s possible to calibrate the screen colors.
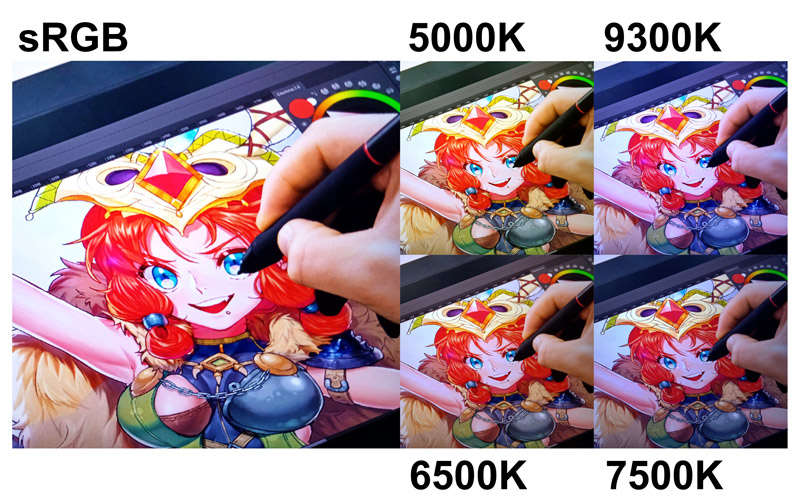
The available color profiles are substantially different from each other and will have immense impact on your work. I will briefly describe them and show you, through pictures, exactly what each one looks like:
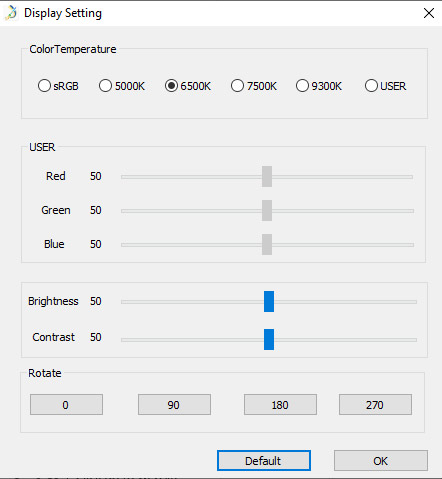
Color Temperature
sRGB
This is by far the best option in the Display Settings panel. It’s the most neutral profile because the colors are precise.
The white looks super bright, and every other color is as sharp as it gets. There is very clear contrast between different colors and even the most subtle hues can be seen.
5000K
The warmest-looking color profile. The 5000K makes the screen look obviously yellowish and it’s the healthiest option for the user’s eyes, especially when working for long periods of time and on poorly lit environments.
Making the screen look more yellow than normal has accuracy implications, but this is a small price if compared to the benefits.
If you believe that color settings are a secondary or perhaps even a tertiary issue, you should probably know that a few years ago I ended up in a hospital after looking directly at a bright screen for over 12 hours. I had a deadline to meet and did not have any other option but working continuously.
Even after receiving medical care and using eye drops for over a week, it took months for my eyes to completely recover. During my whole recovering period I could only look at yellow-tinted screens, anything else would cause a sharp, stabbing pain in my eyes.
6500K
This color profile is what is commonly found in laptop screens. It’s only slightly warm and much less bright than the sRGB configuration mentioned above.
7500K
Similar to the 6500K, but instead of the warm look, it’s balanced between yellows and blues. It’s slightly darker than the 6500K.
9300K
The 9300k immerses the screen into a noticeable blue tinge, which helps reducing glare; however, this reduction comes at the cost of color accuracy.
USER
This one is also neutral and does not have any special characteristic by default.
If by any chance the user is not satisfied with the factory-predefined screen options, it’s possible to alter several screen values and achieve a more personalized output.
Color Temperature Comparison
The image below shows objectively what each color temperature profile looks like.
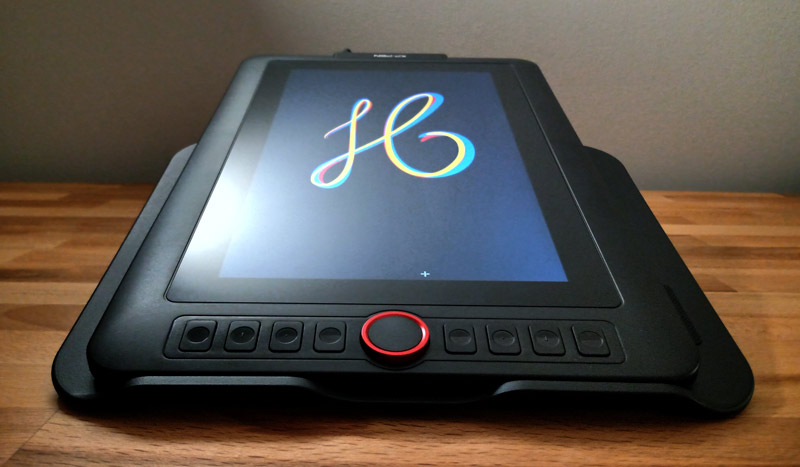
Screen Rotation
In certain occasions, setting the screen orientation to portrait mode can be helpful. This is where the Screen Rotation property comes into play.
Here is an example of what the Artist 12 Pro looks like in portrait mode.
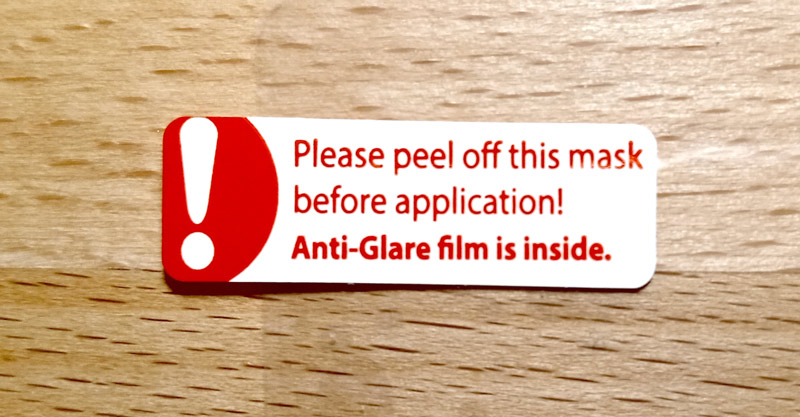
Anti-Glare Optical Film
The screen comes with a thing anti-glare layer that not only reduces glare (the glossy look that all glass surfaces have), but also works as a scratch protection device.
As soon as you open the Artist 12 Pro box, you will notice that there’s a large piece of paper attached to the tablet’s surface.
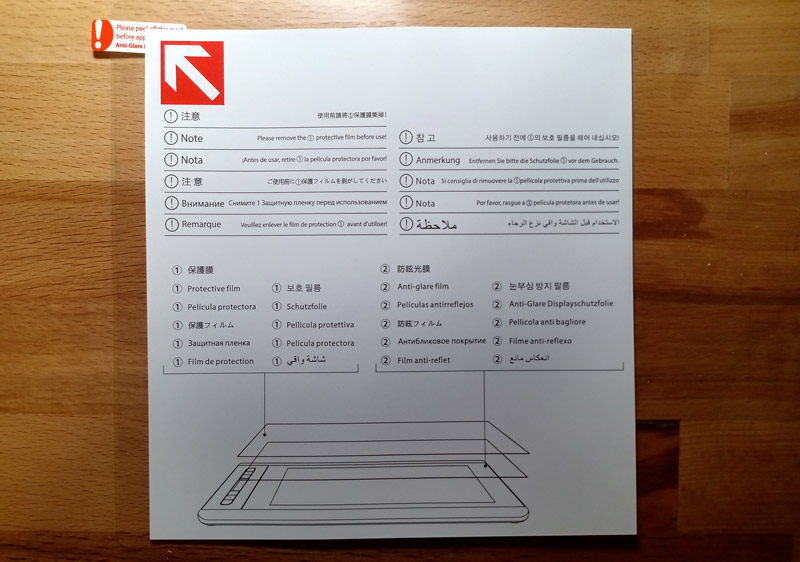
That paper is super large for a very good reason.
It’s a warning.
It informs you, the artist, that there are two thin layers on top of the tablet. One of them is there simply for extra protection during the transportation from the store to your house. This layer is supposed to be removed.
The second layer is the anti-glare optical film and must not be removed.
Be careful not to remove the anti-glare optical film while removing the other layer on top of it.
Both of them look strikingly similar and it’s easy to peel both at the same time by mistake.
I can say this with confidence because that is exactly what I did. I ended up removing both layers and once you do that, it’s not possible to use the same anti-glare optical film again because once you replace it on the screen, it will be completely full of bubbles.
In case you do remove the the optical film by mistake, like I did, you have two options:
- Use the drawing tablet without the anti-glare optical film.
- Buy another optical film online and put it on the screen by yourself.
I have been using my Artist 12 Pro without the anti-glare film and it hasn’t been a problem to me. That said, I only use my tablet indoors and my work environment does not contain any intense source of light, so I don’t have to worry about glare.
In case you do work in a place with many light sources, especially one right above the table where you will use the drawing tablet, make sure to use the optical film.
Stylus (Digital Pen)
The Artist 12 Pro comes the recently developed P2A digital pen. It literally has all the characteristics you would expect from a professional stylus.
Besides that, the stylus is sturdy and can sustain a few accidents without any visible or internal damage whatsoever. I’m a particularly clumsy person have already dropped this pen more times than I would like to admit, everything still works properly.

Among the most important features of the digital pen you will find:
Battery-Free
Forget about worrying about charging your stylus while you are not using it. This pen does not need any kind of charging or batteries for that matter. It still amazes me that some manufacturers still produce pens that need to be charged, but fortunately you won’t have this sort of problems with this one.
8192 Levels of Pressure Sensitivity
Although nearly all the digital pens that have entered the marked within the previous months are classified as having 8192 levels of pressure sensitivity, my own experience tells me that this data is simply not true.
The stylus I found with the Artist 12 Pro is one of the few examples of pens that work exactly like advertised.
This digital pen is particularly accurate and yields the expected results faster than many others.
Let me illustrate my point.
I have tried to draw the exact same thing with 2 different pens, both of them are said to have 8192 levels of pressure sensitivity, but one of them took me over 20 attempts to get the desired result, while the other (Artist 12 Pro stylus) got the job done the very first time.
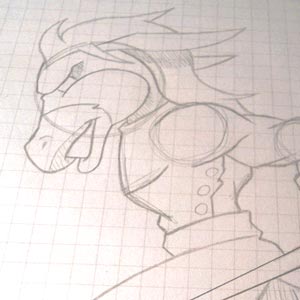
Pen Tablet Lettering (23rd attempt)
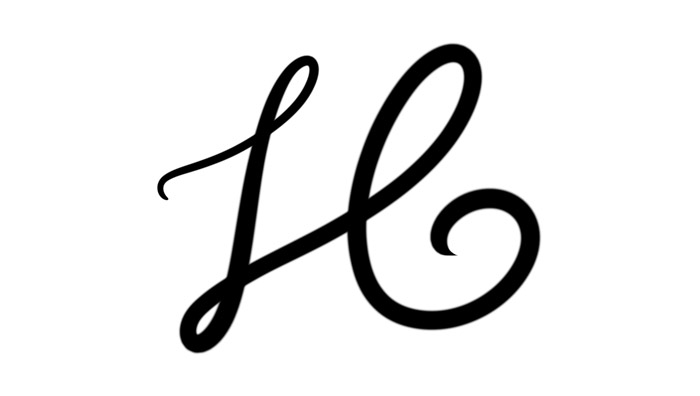
The image below shows the result I got after my very first attempt with a display drawing tablet.
Artist 12 Pro Display Drawing Tablet Lettering (first attempt)

Tilt Support (Up to 60 degrees)
Tilt support is another important characteristic. In the past, artists had to hold their digital pens in a very specific position in order to get the tracking to work properly.
Over the years, tracking became increasingly more stable and reliable, partially because of the tilt technology, which allows the user to draw virtually the same way that a regular pen is used.
Another featured that comes with the tilt and is usually forgotten is the tilt-shading.
Do you know that effect you get when you tilt a regular pencil to shade a drawing?
Now you can do that with digital pens as well. If you still haven’t tried it, go ahead. It works better than you would expect, and it helps give digital artwork an edge.
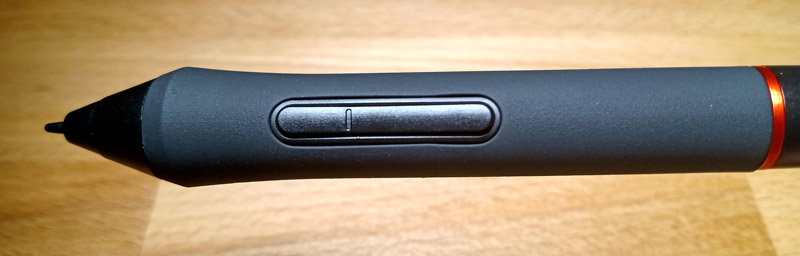
Stylus Design
It’s perfectly clear that functionality is the characteristic that truly matters in digital pens. Being battery-free, having 8192 levels of pressure sensitivity and offering tilt support is what makes the stylus great.
However, XP-PEN has taken one step forward and paid special attention to the design of the stylus that comes with the Artist 12 Pro.
This is unquestionably the best pen ever released by XP-PEN, both in functionality, design and style.
It has an almost entirely black look with a discreet red metallic ring going through the middle of the pen. The holding area is made of rubber and feels smooth to the touch.
The manufacturer decided to follow the same color scheme for both the drawing tablet and the stylus, giving them a sense of unity and integration.
Stylus Buttons
As it was previously mentioned, functionality was definitely the driving force behind the development of this stylus.
The Artist 12 Pro’s stylus has two slightly raised buttons that sit exactly at that point in which they are easy to press, but not so easy as to be pressed by mistake.
Similar to the shortcut keys on the drawing tablet, the buttons located in the body of the digital pen are also programmable and can be configured to assume different roles such as switching to a different brush or becoming an eraser.
Replaceable Nibs
Another relevant feature of the stylus is the possibility of changing nibs (pen tips).
This display tablet’s digital pen comes with a soft nib and 8 replacements that you can use as the nibs wear out over time.
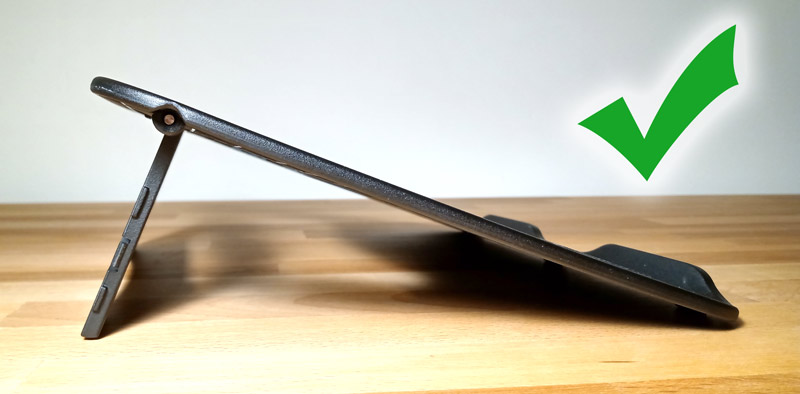
Drawing Tablet Stand
This tablet comes with a plastic stand that puts the device in a great angle for drawing.
You will find the stand inside the box, right below the actual tablet.
At first it looks completely flat. You need to push its middle area outwards so that the stand takes its functional position.
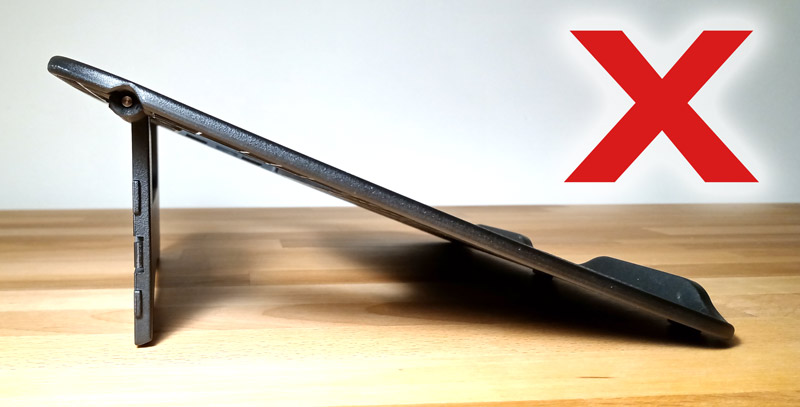
Important observation about the Artist 12 Pro Stand
Make sure to push the middle area all the way out, because if you don’t, the stand may snap back to its original flat form and your tablet may suffer a small accident.
Since the stand can be a little stiff the first time you use it, you may get the impression that you have already set it up properly, when in fact you haven’t.
Let me explain this through pictures:
If your stand looks like the picture below, with the supporting part making a 90 degree angle with the table, you still need to push it a little more outwards:
This is how the stand should look like:
Compatibility
Operating System Compatibility
Full compatibility with Windows 10, 8, 7 (32/64 bit), MAC OS 10.10 (and higher).
The tablet might also work with older operating systems, but there are no guarantees. On top of that, even if it works, stability may be an issue.
Software Compatibility
The display tablet will work with nearly every drawing software available in the market. The list is so vast that it would be counterproductive to write every single one down, so here are the main ones:
- Open Canvas
- Corel Painter
- GIMP
- ZBrush
- Toon Boom
- Autodesk SketchBook
- Illustrator Draw
- Photoshop Sketch
- Among others…
Adobe Suite:
- Illustrator
- Photoshop
- InDesign
- Premiere Pro
- LightRoom
- After Effects
- Fresco
- Animator
- Dreamweaver
- And all the others…
Microsoft Office Suite:
- Word
- PowerPoint
- Excel
- Outlook
- OneNote
- And so on…
Driver Settings
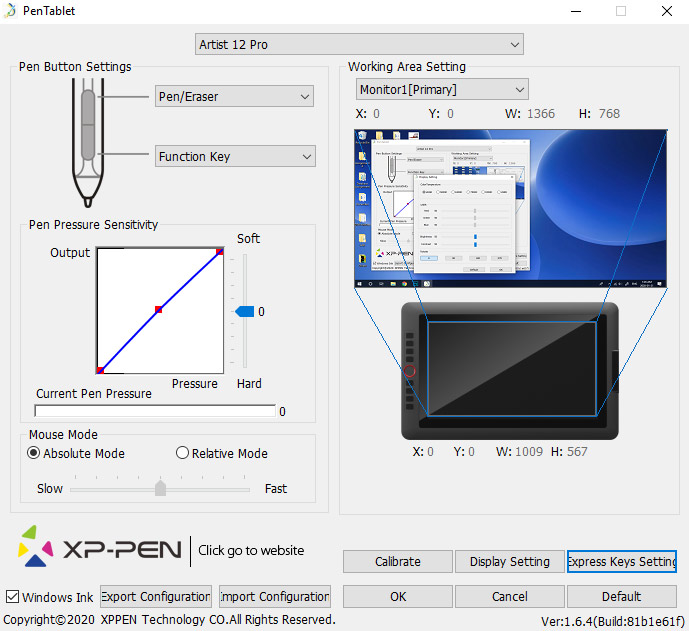
Even though the Artist 12 Pro works perfectly well out of the box, it’s still possible to customize numerous features of the device, such as: pen button settings, pen pressure sensitivity, screen (display) settings, express keys settings and so on.
Artist 12 Pro Driver Settings Main Screen
The image below shows a screenshot of the tablet’s driver software. You will see all these options right after installing the Artist 12 Pro driver. The settings are straightforward and easy to change.
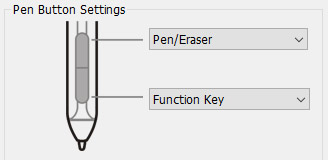
Pen Button Settings
The stylus has two buttons that can perform different tasks. You have complete freedom to assign any command to either one of them.
By default, one of the buttons works as an eraser and the other doesn’t do anything.
Since I do not use the eraser(ever), the first thing I do is disabling that feature.
Check the picture below to see what the pen button settings section looks like:
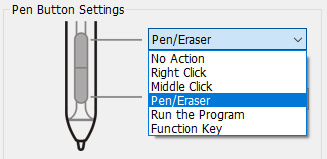
Once you choose which button you would like to customize, the system will prompt you to assign an action to that specific button.
You may see the options in the picture below:
It’s also important to note that you can also disable both buttons so that you don’t have to worry about pressing them by mistake while drawing.
This option has proven to be very helpful for beginners. Absolutely everyone that draws with a digital pen for the first time end up pressing these buttons every few seconds. I have seen this behaviour over an over again.
Although I’m particularly experienced when it comes to drawing tablets, I have never developed the habit of using the buttons of the stylus. I prefer to disable them and simply use the shortcut keys on the tablet itself to perform whatever other simple tasks I need.
Pen Pressure sensitivity
This aspect of the settings is extremely important because it has a direct relation to the drawing experience. It means much more than improving workflow and drawing faster. It has to do with the quality of the artwork.
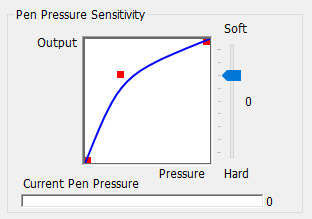
Some people are heavy-handed and will be better off with lower pressure sensitivity, this way a substantial amount of pressure will need to be applied to the pen while drawing, therefore causing more stroke variation and a more enjoyable drawing experience whilst yielding better results.
Now, if you are like me and likes to draw very lightly, it would be advisable to set the pressure sensitivity to the maximum, meaning that merely letting the pen touch the screen is enough to see something on the screen.
Shortcut (Express) Keys Settings
Nowadays, it’s quite rare to find drawing tablets that do not have shortcut keys, and there’s a logical reason for this: express keys are incredibly useful.
These buttons, along with roller wheels (dials) are one of the simplest ways to improve an artist’s productivity.
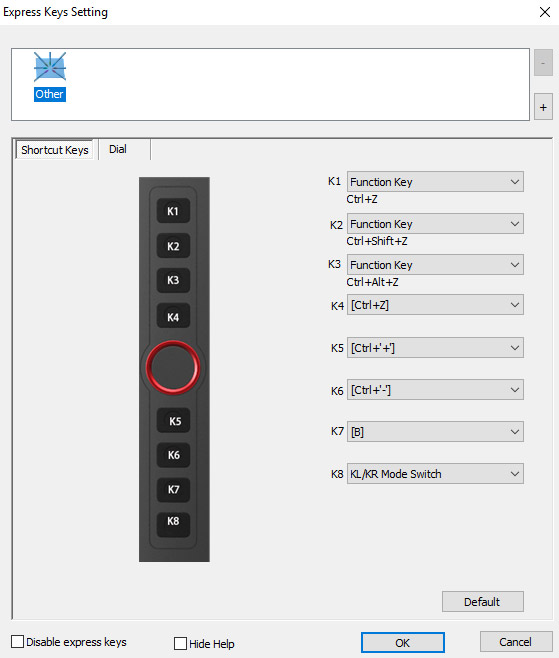
Usually artists don’t think about this, but small tasks that need to be repeated multiple times across the drawing process take a substantial amount of time.
A clear example of this is dealing with different brushes. While switching from one brush to another may only take 5 seconds, if we multiply that by 300, which may actually happen when it comes to intricate illustrations, that adds up to 1500 seconds (25 minutes).
By using shortcut keys, anyone can perform simple tasks with a single click that does not take more than a second. If we use the example above once again. The advantages of using shortcut key are abundant.
What Comes in the Artist 12 Pro Box
(Click here to see the Artist 12 Pro on Amazon)
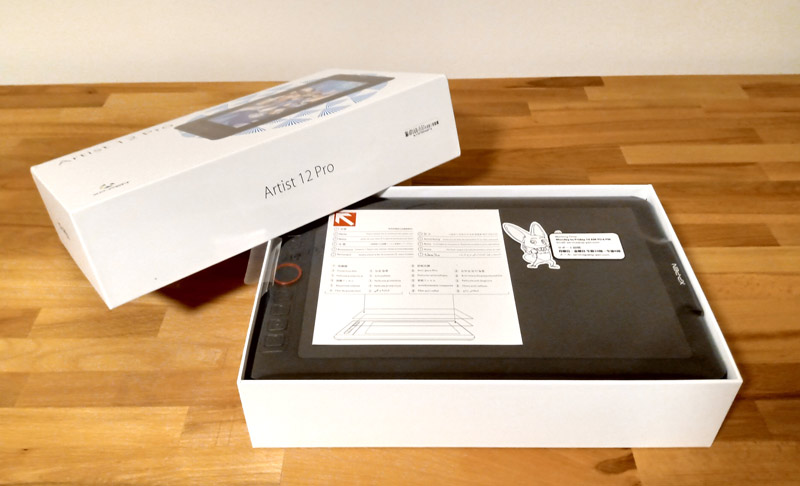
The Drawing Tablet
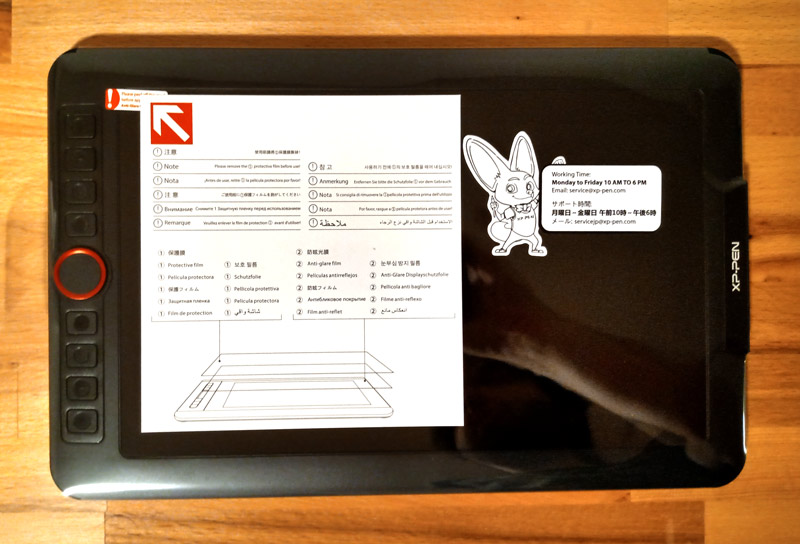
The first thing you will see is that the screen of the drawing tablet is protected by two different layers.
Now, it’s very important that you pay attention to what I’m about to say.
At first glance, these two layers look like one single transparent layer that you can peel.
In fact, there’s even a small red note that says: “PEEL OFF”
Check the picture below to understand it:
If you’re not careful, you will end up removing both together, which is exactly what I did.
Don’t do that!
The top layer is there to avoid the screen from getting scratched or damaged before the tablet arrives in your house, it’s totally OK to get rid of it once you get your tablet.
That being said, that second layer has an important function! It’s an anti-glare layer and it’s very useful, especially when you need to draw on a well-lit environment.
I’m going to write this once more so that you get this done properly:
You should only remove the top transparent layer, do not peel the other one.
You may be asking yourself:
“Why should I be so careful not to remove the anti-glare layer?”
Simple. It’s because once you remove it, you can’t put it back.
To be more precise, you can put it back, but there will be dozens of tiny bubbles between the screen and the anti-glare layer, which will make it impossible for you to use the drawing tablet comfortably.
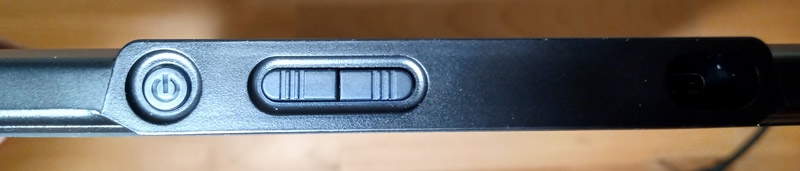
If you do remove both layers by mistake, there’s no need to get desperate. You will still be able to use the Artist 12 Pro perfectly well, the only difference is that the screen will be a bit shiny, especially when you’re working under bright lights.
Since you’re able to regulate the brightness of the screen, either through the tablet’s driver software or manually by clicking the two buttons on the right side of the device (see picture below), if you think the screen is too shiny due to exterior lights, simply increase the brightness of the screen and the glare won’t bother you anymore.
Pen Case
The Artist 12 Pro comes with the traditional XP-PEN pen case, which contains the stylus (digital pen) and 8 extra nibs.
Most people simply leave their digital pens laying around. This is a bad habit and you should do your best to avoid acting like this. These styluses look quite similar to regular pens and are particularly easy to lose.
Make sure to always keep your stylus inside of its case, this way you will protect it from unnecessary damage, keep it near its nibs and make sure that it doesn’t disappear.
The stylus can be found by opening the bottom of the pen case.
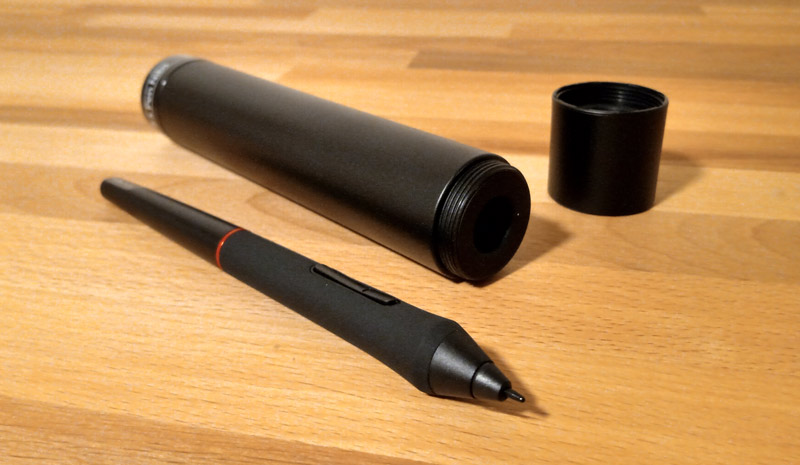
Stylus (Digital Pen)
As mentioned before, the tablet has a single pen that possess all the characteristics you could possibly want in a tool like this. On top of that, the pen looks absolutely gorgeous.
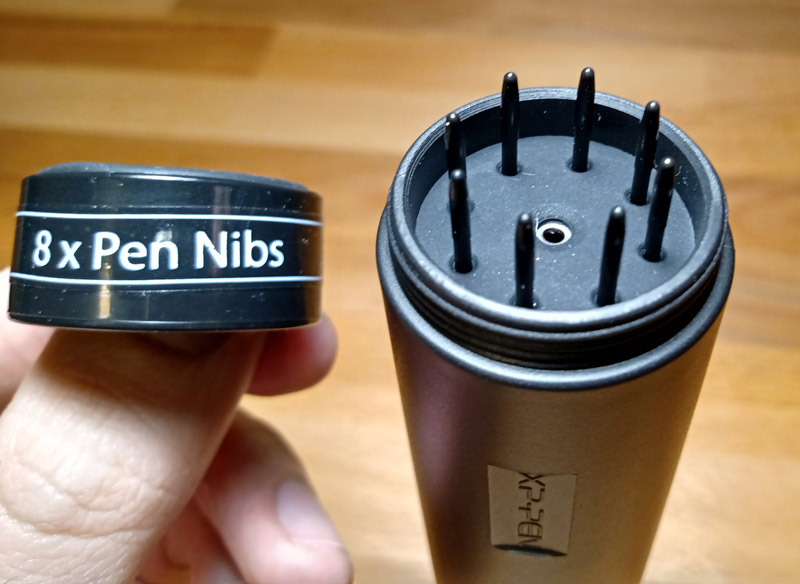
Nibs
These are the extra replaceable pen tips that come together with the stylus.
These days companies prefer to release digital pens with tips that wear out over time. There’s a reason for this, these tips (nibs) better emulate the feeling of drawing with a real pen and are much more comfortable to use than older ones, which were made of a hard plastic that would easily slip when in contact with the drawing tablet’s surface.
The 8 extra nibs can be found by opening the top of the pen case. Check out the picture below to see what I’m talking about.
Wires
This device comes with a few wires. At first it may look slightly confusing, but a glance at the Quick Guide is enough to understand the set up and to get everything working properly.
One of the things that will certainly catch your attention is the fact that one of the cables is actually a group of 3 different wires merged together. See the picture below to understand it:
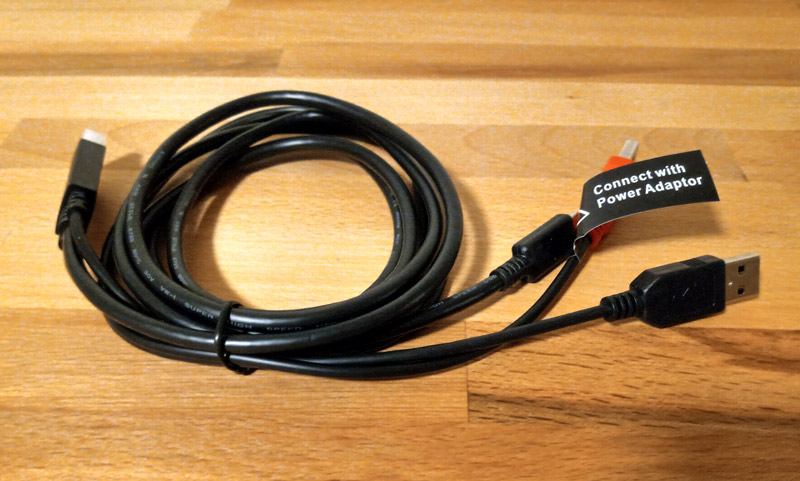
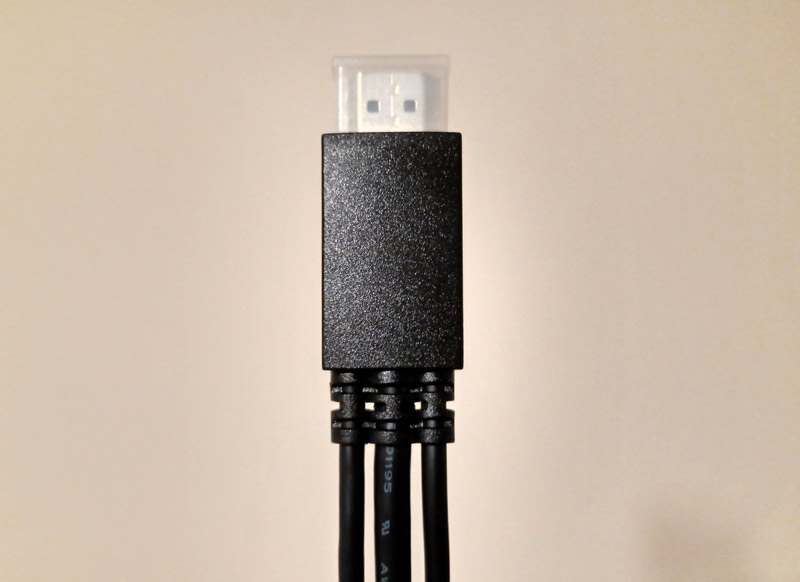
As you can see, this is a multi-purpose wire. It connects the drawing tablet to the computer through the HDMI port and then the tablet to a power outlet.
Once the initial connections are made, there’s another wire that acts as an extension of the power cable so that it’s long enough to be connected to a power source located far from the tablet.
This is what the extension cable looks like:

Adapters
Since these tablets are sold worldwide, XP-PEN made sure to provide outlet adapters that will work in virtually any country.
This is the first time I have seen a company go the extra mile to make sure that all customers will be able to use their product immediately after purchase.
I felt particularly impressed by this because I have recently moved to a different country and found immensely frustrated by the fact that none of my electronics could be plugged without me buying an adapter (which are surprisingly expensive).
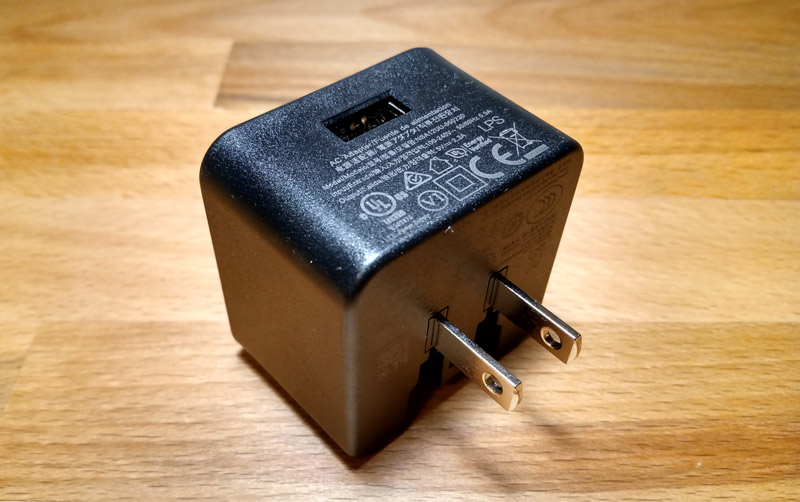
Apart from the standard model that comes with the drawing tablet, there are 3 extra adapters. Check out the pictures below to see each one of them:
Standard Adapter
This one is widely used in North America and Japan.
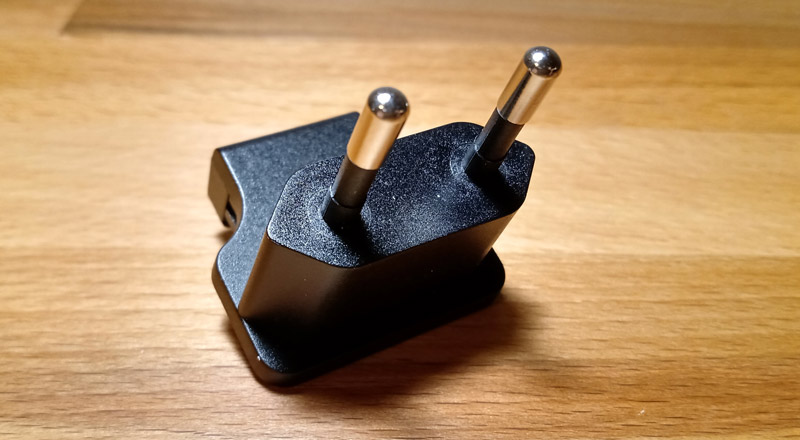
Second Adapter
Mostly used in Europe and Russia.
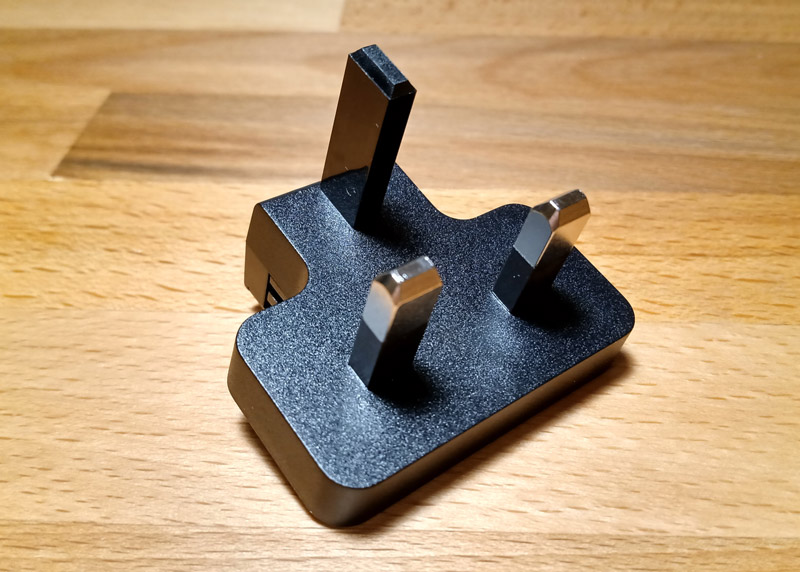
Third Adapter
This one is used in Great Britain.
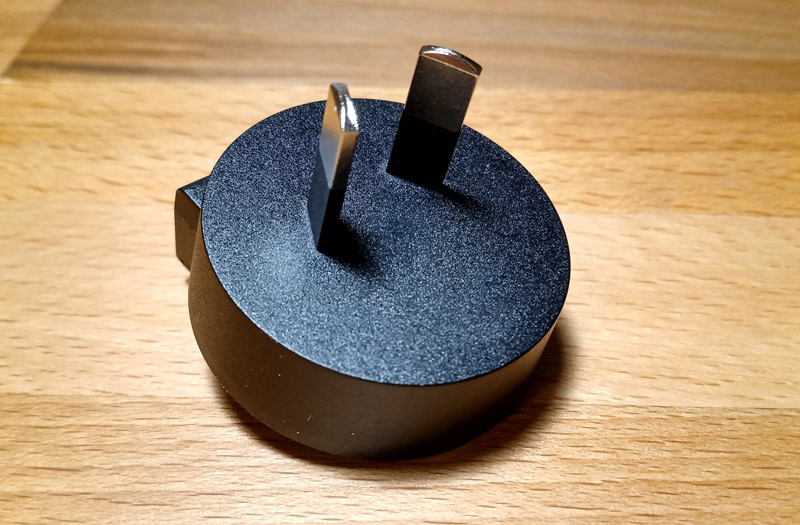
Fourth Adapter
This one is more common in Australia and China.
Drawing Tablet Stand
One of the advantages of this display tablet is that it already comes with a stand by default. It’s relevant to mention that only a handful of tablets are coupled with this extra piece of hardware at no extra cost.
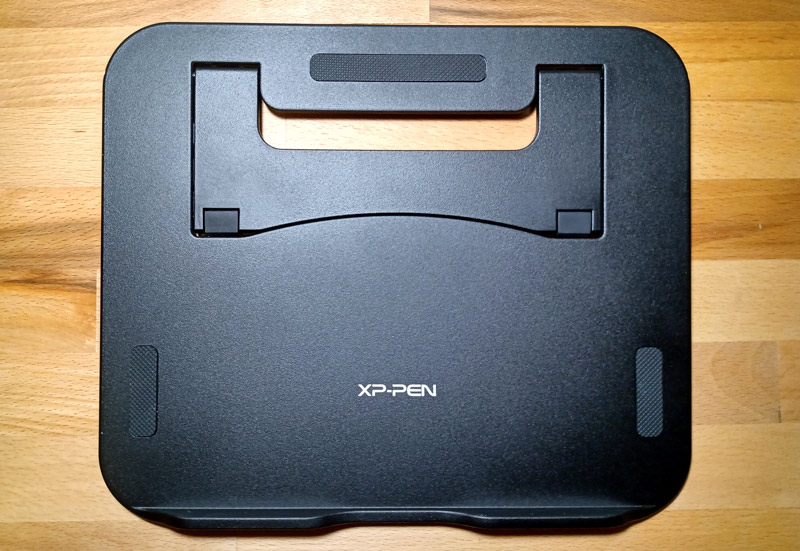
Although this particular stand could not be described as sturdy, it does the job and is unquestionably good enough.
It is basically made of regular plastic and has some supporting areas made of rubber in order to keep the tablet from sliding.
Usually stands are sold separately and they tend to be considerably more expensive than you would expect.
This is another reason why this device is so great, you can literally start working right after turning it on, there is absolutely no need to worry about anything else.
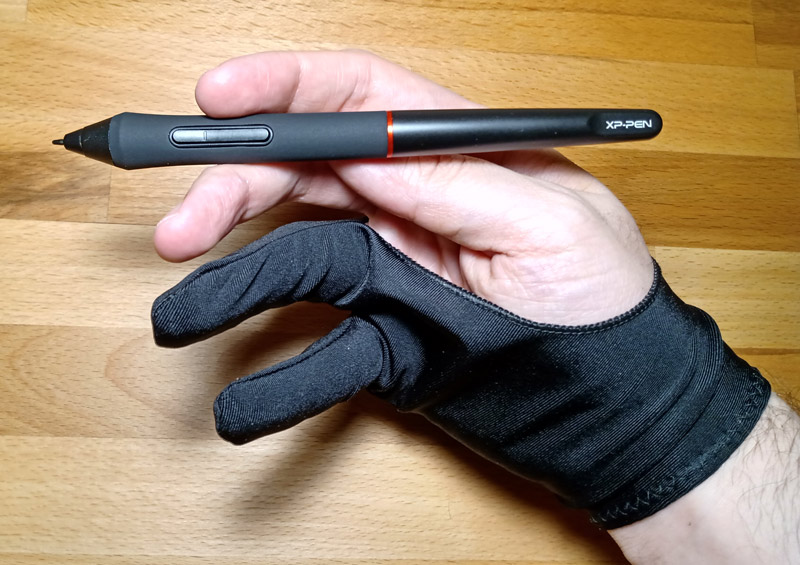
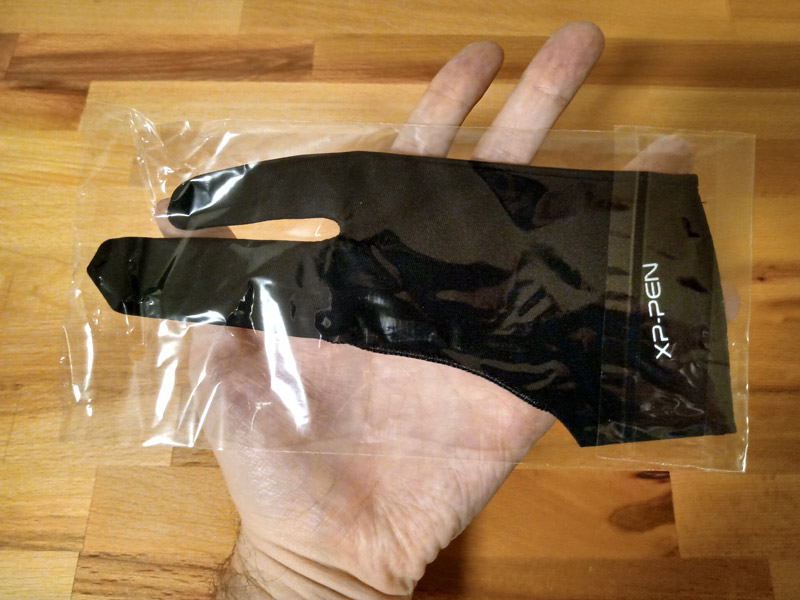
Drawing Glove
Besides the adapters and the stand, everyone who buys the Artist 12 Pro also get XP-PEN’s traditional drawing glove.
While it’s true that this glove does not have any special characteristics, it’s a decent drawing glove and does exactly what you would expect it to do.
It’s made of a thin material and drawing with it is super comfortable.
I’ve grown used to wearing a glove while drawing and always have a few of them lying around. You don’t really need to wear one, but it does help the hand slide across the drawing surface, specially if said surface is made of glass and you have mistakenly peeled off the anti-glare layer (like I did).
Before I forget, the glove that accompanies this display drawing tablet is completely black. I know that this sounds like a minor detail, but if you try using a white glove you will be impressed by how fast it gets that dirty, worn-out look. Sometimes it only takes a week.
Always go for black drawing gloves.
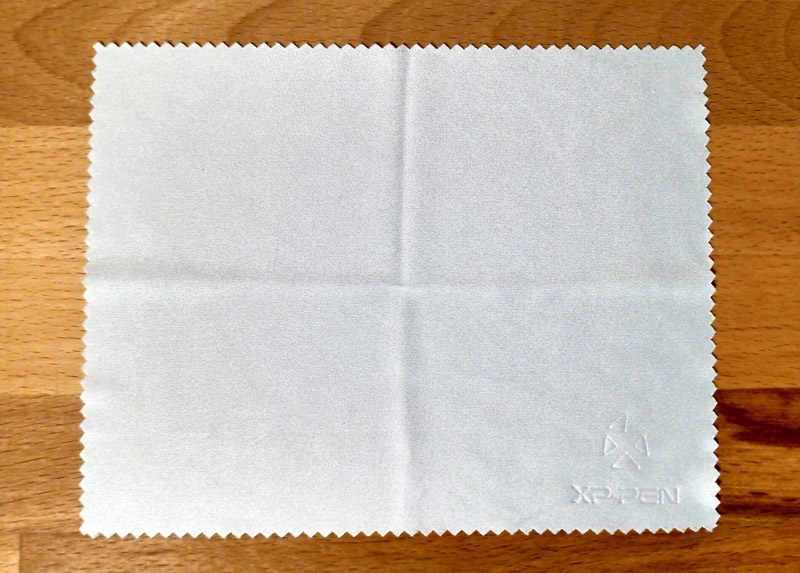
Cleaning Cloth
As traditions dictate, XP-PEN also provides a cleaning cloth with every tablet it sells. This time they opted for a baby-blue piece of cloth. It’s precisely the same fabric seen in earlier versions, the only difference here is the color.
At first, I thought it wasn’t a great idea to pick a light color for a cleaning piece of cloth because it gets easily dirty, but after thinking about it I realized that this is the whole point of it!
A light-colored cloth shows exactly how much dirt came out of the tablet, which is useful information for the user.
Think about it, if you’re used to leaving your tablet next to a window and you realize that the cloth gets particularly dirty at the end of the day when you wipe the device, leaving it by the window is probably a bad idea.
Important observation: while writing this article, I tried to clean the glass surface of my Artist 12 Pro with a regular piece of cloth that I had on my table and the result was disastrous.
The cloth that comes with the drawing tablet has a specific set of properties and was designed specific for cleaning screens, you must use only this one to wipe your tablet otherwise you may end up scratching it.
This is a very small detail, but it makes perfect sense.
Warranty Card
This is something that nobody expects to have to use; however, sometimes there are manufacturing mistakes or even accidents during transportation. This card basically says that XP-PEN has you covered.
I have contacted XP-PEN several times for different reasons and they have answered me in a timely manner.
In fact, it’s safe to say that currently they are the fastest company when it comes to customer support. I was actually surprised by it. Since they are a smaller company than Wacom, I imagined that their customer support would be slightly slower, but it’s not.
If you have any kind of issues with your recently purchased drawing tablet, make sure to contact them.
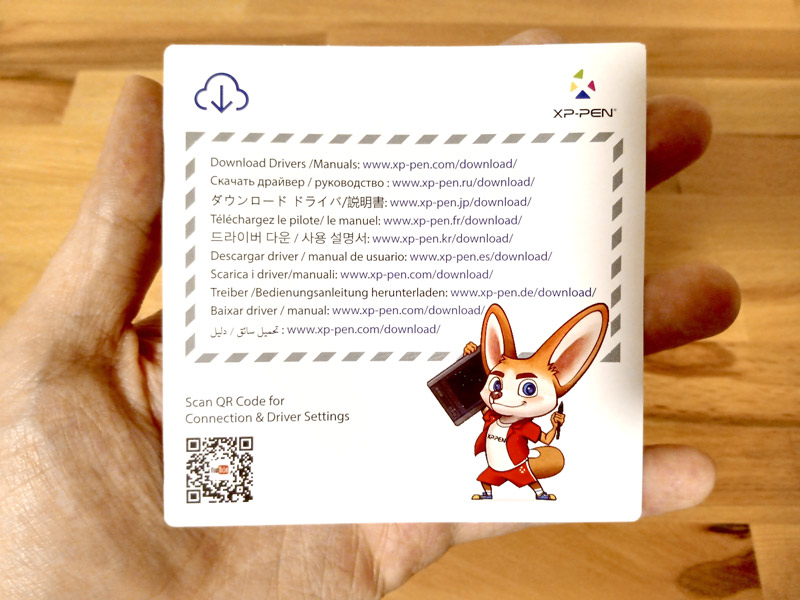
Driver Card
You can find every single XP-PEN driver or manual by going directly to their website: xp-pen.com/download
The driver card says exactly what I’ve mentioned above. The only difference is that it’s written in many different languages.
They have also added an illustration of their cool mascot in there just to give it that extra edge, see the image below.
Quick Guide
This is a must-read document that explains absolutely everything you need to know about the Artist 12 Pro. Seriously, read it.
It has important information about the wires you will need to use in order to connect your brand-new tablet to the computer.
If you are feeling lazy and don’t want to read anything, know that most of the information in the guide is comprised of images.
Yes, that’s right, there’s not a whole lot of text in there. The images speak for themselves. Since you are an artist, I’m sure you don’t mind looking at some images, right?
Check it out:
Thank You Card
I also appreciate that XP-PEN took the time to create a nice thank you card for their customers.
You may think that this is nothing more than a marketing gimmick, but from my experience talking with them over email, I feel like XP-PEN really values their customers and I sincerely believe that the card is a genuine expression of gratitude.
See the “Thank You” card below:
First Impressions
The first things that crossed my mind as soon as I put my hands on the box were:
- It’s heavy
- There’s a lot of things in it
- The drawing tablet looks amazing, especially because of the red detail
- I have never seen these many adapters together
- There are more wires than I expected
- I want to draw with this right now
All my initial impressions turned out to be true. The box is packed with cool things and the unboxing process itself was a lot of fun.
The more I dug into the box contents, the more I felt the drawing anticipation grow.
I remember that I just wanted to connect the wires randomly and start drawing as soon as possible, but eventually my rational side regained control and I decided to read the Quick Guide before plugging anything.
I strongly suggest that you do take the time to read the Quick Guide before anything else. I know that reading before drawing is a mood killer, but it’s important that you do.
Had I read the instructions carefully, I would not have peeled off the anti-glare layer by mistake. Lesson learned.
This is the point about these articles, I make the mistakes so that you don’t have to go through the same thing.
Drawing Experience
As soon as I turned on the Artist 12 Pro I was shocked by the wave of colors that emanated from the screen.
I immediately opened Photoshop and started illustrating.
Everything looked crisp and the colors were intense as they should always be.
The stylus feels great to the touch and work precisely how I expected. Another thing worth mentioning is that the tracking of the digital pen is also superb. The drawing tablet is capable of “finding” the pen even when it’s located substantially far from the glass surface.
I did notice a small lag while attempting fast strokes, like when drawing eyebrows. It’s nothing that compromises the drawing experience, though.
You should always keep in mind that although companies do everything within their reach to emulate the experience of drawing with real-life materials, tablets and styluses are still tools for the digital world and therefore are subject to technology limitations.
That being said, the whole experience was overwhelmingly positive and I was suddenly taken by an urge to draw nonstop like I did when I was a kid.
Best features
Drawing Tablet Stand
I was particularly happy once I realized that the Artist 12 Pro comes with a stand. This is not an add-on, this is not something you need to opt in at purchase, the stand will be there inside the box just like the cables and the stylus (digital pen).
The reason why I mention this is because almost every company sells their stands separately. This is usually a way companies find to make extra cash.
XP-PEN, however, did the right thing and put their customers first. Drawing with display tablet requires the use of a stand and they have surely taken this into consideration while developing this product.
Roller Wheel (Dial)
Every professional drawing tablet should come with a dial, the more I draw, the more this statement makes sense to me.
What’s special about the Artist 12 Pro dial is that it clicks when you spin it. This clicking increases zoom accuracy because it allows the user to know exactly how much was zoomed.
Let me explain it better:
Let’s suppose you decide to zoom in to work on a character’s eye color, if you turn the dial clockwise until you hear 6 clicks, you know that by turning it exactly 6 clicks counter clockwise you will get back precisely to the starting point. This is particularly useful because it combines precision with speed.
Looking for the zoom button on Photoshop or Illustrator is a thing of the past, using the dial is definitely the smart way to go about it.
What Could Be Improved
Cords
There are too many cords, they are mostly merged, but you still need to connect everything in order to get the Artist 12 Pro to work.
While this is not a problem if you always keep the device in the same place, it can be annoying when you do have to move it around.
I wish there were fewer cords, it would be easier, and my work area would look much more organized.
My suggestion to XP-PEN would be to try to simplify things, although I’m well aware of the engineering challenges. Having fewer wires is always better.
Again, this is not a big issue, it’s much more a matter of user-experience.
Response Time
The pen works incredibly well, just as the drawing tablet does; However, I have felt a tiny delay when I tried to draw multiple strokes rapidly. This slower response time only became noticeable in very specific cases like drawing eyebrows or speed-painting abstract looking artwork.
Like I said before, this does not compromise the drawing experience, but if I could improve something in the Artist 12 Pro, it would be giving it a lighting-fast response time.
Why the Artist 12 Pro Makes Artwork Look Better
I used to say that owning a display drawing tablet (the ones that have a screen) does not make you a better artist, it simply enhances workflow and allows you to work faster. This is where I made a mistake.
Well, I wasn’t entirely wrong, display tablets do enhance workflow quality and do help artists to work faster, but there’s much more to it.
I’ve come to this conclusion after using solely screen-less drawing tablets for 30 days and then switching to a display drawing tablet (to the Artist 12 Pro to be more precise).
I was extremely surprised by the results I got from my first drawing session. Not only was I drawing faster, but I was drawing better!
The amount of accuracy gained from using a display tablet like the Artist 12 Pro has a massive impact in artwork quality and I wasn’t aware of this until I ran this month-long test.
What I’m really trying to say is that while a display tablet doesn’t really make you a better artist, it does help you to express creativity so much more accurately that it ends up leading to better artwork.
You don’t have to take my word for it, draw something on a screen-less tablet and then try drawing the exact same thing on a tablet that has its own screen, you will be shocked by the result.
Conclusion
I could spend whole paragraphs talking about the good things about this tablet (as I did), but the one thing I feel I must mention once again is the quality of the colors on the screen of the tablet.
Not even in my wildest dreams I could have imagined that a tablet this affordable would have been built with such high standards.
The bottom line is, if you are a digital artist or are planning on becoming one, you will need a display drawing tablet (display means it has a screen).
If you feel like you would like to know some more about this display tablet, make sure to visit XP-PEN’s website. They have video, illustrations made with the Artist 12 Pro and even more pictures.
In case you like the Artist 12 Pro, you may also check other drawing tablets at XP-PEN’s store.
For more a more affordable drawing tablet from XP-PEN, make sure to read about the XP-PEN DECO PRO.
Thank you very much for reading and remember to keep on creating,
Bruno Santos

I just love this article so much !
Every Artist 12 Pro user or XP-PEN user need this!
Thank you so much!
Hi Winnie,
I’m glad I could help! I’ve added a lot more useful information since you left this comment, make sure to check the updated article.
Have a wonderful week,
Bruno